imfreedom.org XMPP Service
As mentioned on the contact page, we run an XMPP instance for imfreedom.org. Accounts for this instance are tied to accounts on hub and only work if you have been given access. Access is given to all current and former board members.
To use this service, you’ll need to add an account to your XMPP client. We’ll walk through doing this in Pidgin below. Please note that if your hub account has two factor authentication turned on, you will need to create and use an application password. See the Jetbrains Hub documentation to learn how to do this.
In the Pidgin “Add Account” dialog you need to enter
the matching username for your hub account. For
the domain you need to enter imfreedom.org. You can then optionally set a
resource to identify this client for yourself and others as well as a have
Pidgin remember your password.
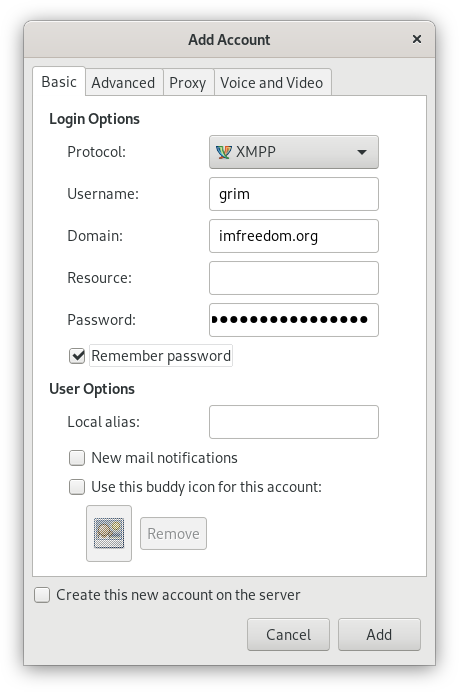
Add imfreedom.org Account Dialog
Once everything looks correct, go ahead and click “Add” and the account should connect. If it doesn’t please verify that all of the settings are correct including your password.
Once you’re connected you can join the board room by selecting
Buddies -> Join A Chat... or by hitting Ctrl-C in the “Buddy List” window.
This will open the “Join a Chat” dialog window.
First you’ll need to select the proper account if you have multiple accounts in
this Pidgin instance. Next you’ll want to enter board
for the Room field. Server should be automatically set to
conference.imfreedom.org but if it isn’t please set it appropriately. You can
also specify a custom “Handle” for yourself in this room. This handle is the
name that is displayed to others. Once everything is set, go ahead and hit the
join button.
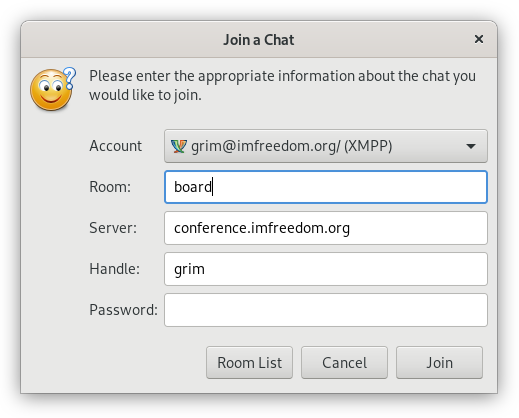
Join a Chat Dialog
If everything went well you should have seen a new window, or a new tab in an existing window, pop up for the chat room. If this didn’t happen please re-open the “Add a Chat” dialog and carefully re-enter the above settings.